
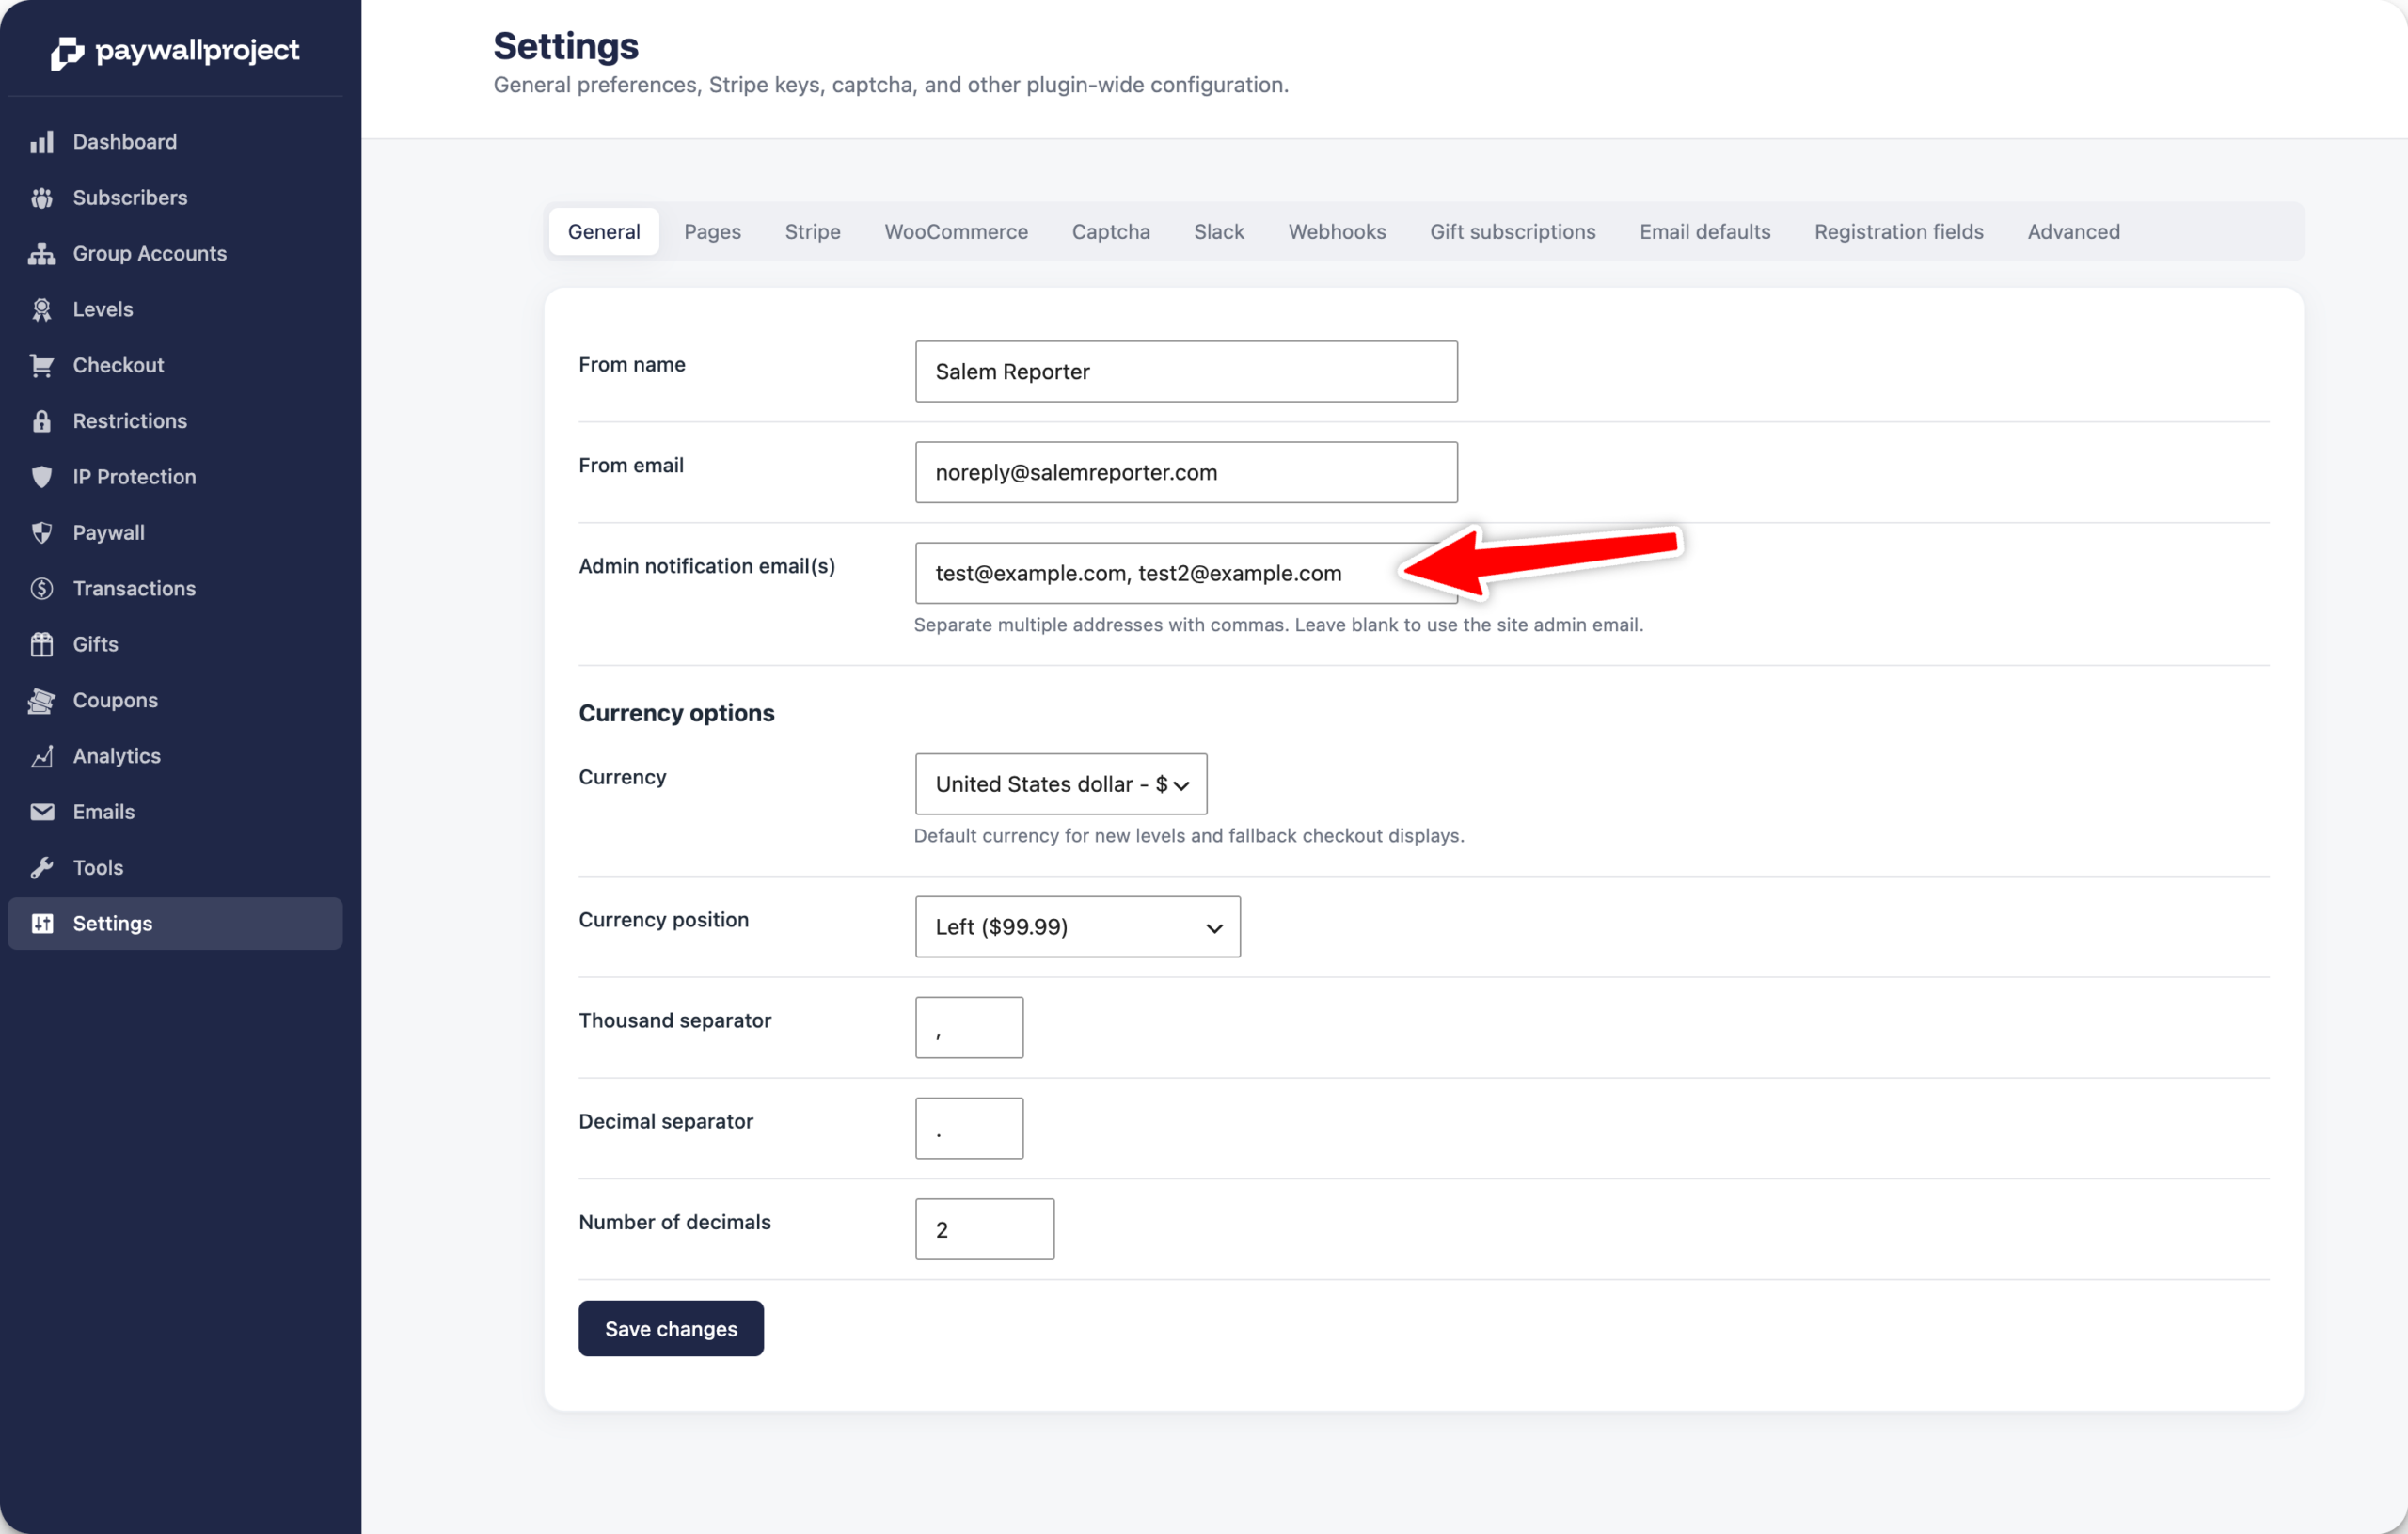
PaywallProject can email you when something happens on your site — a new subscriber, a payment, a cancellation. By default those go to your WordPress site admin address. The Admin notification email(s) setting sends them somewhere else, or to several people at once.
Where to set it
Go to PaywallProject → Settings → General. The field is the third one down, under From name and From email.
Enter one address, or several separated by commas:
[email protected], [email protected]Then click Save changes.
Leave it blank and the notifications go to your WordPress site admin address instead (Settings → General in WordPress). Clearing the field does not switch the emails off, it just hands them back to that address.
Which emails this affects
Every notification addressed to you rather than to a subscriber. They are listed under PaywallProject → Emails, grouped as Admin notifications:
- Admin: new subscriber — someone subscribed
- Admin: payment succeeded — a payment went through, renewals included
- Admin: subscription canceled — someone cancelled
- Admin: subscription expired — a subscription reached its expiry date
- Admin: gift subscription — someone bought a gift subscription
Every address you enter receives every one of these. There is no per-address routing — you cannot send payments to one person and cancellations to another.
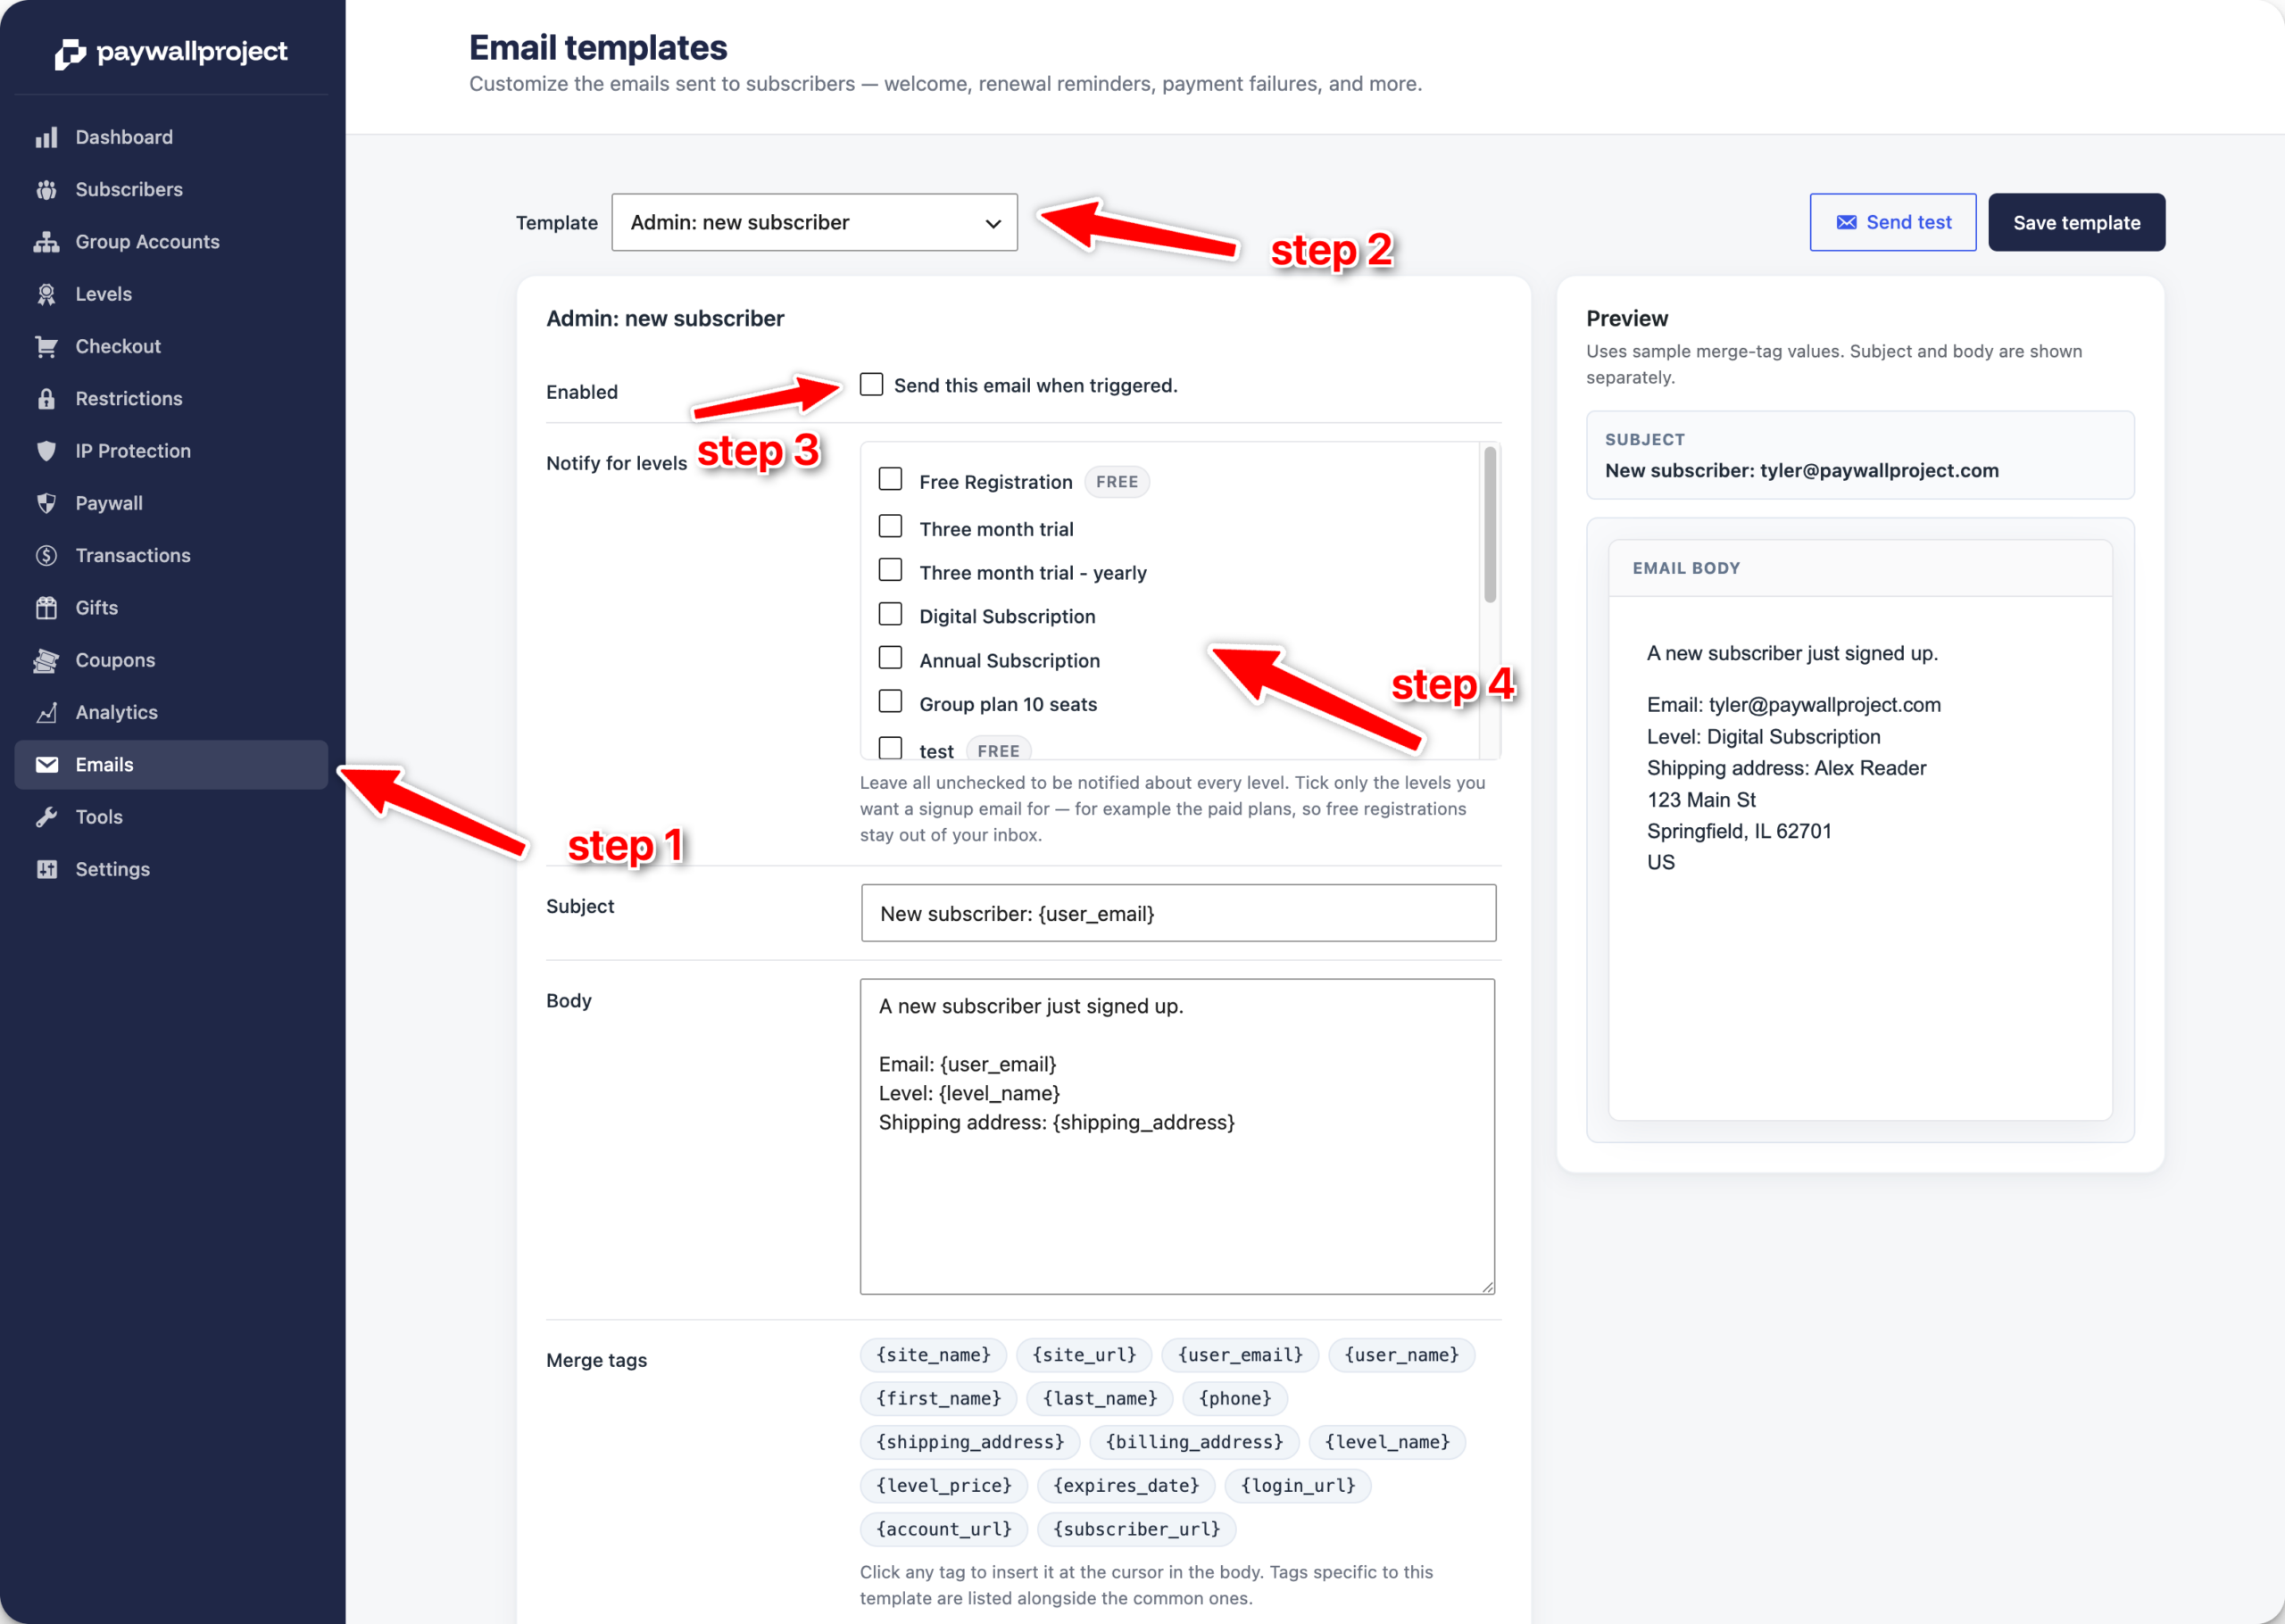
To stop a particular notification for everyone, open it under Emails and untick Enabled. That is also where you edit the subject and body.
Cutting down the noise
Only get told about certain plans
If you run a free tier alongside paid plans, every free registration produces a new subscriber email, and the paid signups get buried.
Open Emails → Admin: new subscriber and use Notify for levels to tick only the levels you want to hear about — the paid ones, typically. Leave everything unticked to be told about all of them.
One thing to know: once you tick specific levels, a level you create later is not included until you come back and tick it too.
Choose when the expiry notice arrives
Emails → Admin: subscription expired has a When to send setting: a number of days, before or after the expiry date. Zero days after means on the day itself. “Before” gives you a heads-up while the subscription is still live, which is the useful setting if you want to reach out before someone lapses.
This one runs on a daily schedule rather than firing the moment a subscription expires, so it can arrive at any time on the day it is due.
Getting too many?
Admin: payment succeeded is usually the culprit, because it fires on every renewal as well as every new signup. On a site with a few hundred monthly subscribers that is a few hundred emails a month. Most publishers switch it off and read the same information under Transactions instead.